Sculpted Concrete and Concrete Overlays

Decorative concrete and concrete overlays are a growing segment of the residential market. Both are designed and manufactured to hold their custom carved or stamped shape, stick to walls and other surfaces without moving, sluffing, sliding, drooping, or running — and be sealed.

Famed architect Frank Lloyd Wright paved the way for reinforced concrete in modern architecture with his Unity Temple (built from 1905 to 1908) which features a Mayan-inspired decoration carved into the concrete. Click Here to learn more.

sculpted concrete

Sculpting concrete requires a variety of tools, each with its own purpose. Using the right tool for the job will help you achieve your desired design, whether you are creating a simple flower pot or an elaborate statue. A basic set of chisels is essential, as well as a variety of other tools designed for working with concrete.

You will also need a good quality concrete mix to work with. Kingdom Products Imperial Vertical Carving Mix is a lightweight and exceptionally strong concrete overlay that can be stamped, carved or molded into realistic stone, brick or block designs. It is available in thicknesses from feather edge to 2” and can be used for both indoor and outdoor applications.

There are three ways to create a sculpture from concrete: casting the concrete, carving it, and using wire mesh. Each has its positives and negatives, but the concrete carving method is becoming a popular choice for homeowners and business owners alike. It’s a great way to add a custom look to a backyard, pool deck, driveway or patio, and it’s easy to do with the right tools.

Once the concrete is mixed, it’s time to begin sculpting. It’s important to start with a clean surface, so be sure to wipe down the mold before starting to remove any excess cement from the surface. Chisels are the most common tool for sculpting concrete, and can be used in a variety of shapes to give your sculpture depth and character. The best chisels are made of high-quality steel and feature hardwood handles.

When it comes to carved concrete, the key is to work quickly so that the concrete doesn’t dry before you’re finished. It’s also a good idea to coat your hands in petroleum jelly before you begin to prevent the concrete from sticking to them.

Depending on the type of sculpture you’re making, you may need to use power tools as well as your hand chisels. Electric tools include saws, drills and grinders, while pneumatic tools are powered by compressed air and can include rotohammers and sanders. Regardless of the type of tool you’re using, it’s important to follow safety guidelines and read the instructions carefully before operating any machine.

Concrete can be sculpted to mimic stone and wood, but it takes more than just the right tools. A skilled craftsman needs to understand how the material behaves and what to expect as it sets up and hardens.

One way to learn the craft is to participate in a workshop taught by an experienced professional. Warren Ness, a rock sculptor and trainer, offers a two-day course that explores the techniques for making carved concrete projects. The workshop also covers how to design and plan a project, how to use the various carving methods, and how to make an overlay that enables the sculpting process.

The first step is to create a base or substrate to build the overlay on. Depending on the application, this may be a poured slab or an existing concrete surface that has been patched and primed. The substrate should be smooth, dry, and free of anti-adhesives to ensure a successful application of the concrete overlay.

If the existing concrete is very rough or pitted, an overlay with a textured skin can be used to mask the damaged area and provide a smoother finish that will accept a carved concrete pattern. In this case, it is recommended that the surface be smooth troweled and cured at least a week before the staining and engraving processes are started.

It is important to use a low-efflorescing carvable mix for the overlay. A pre-mixed product like Pro Wall Mix from works well. This is mixed with sand, cement and water on site to create a concrete specific to the project. It is also possible to use a regular thin-set tile mortar for the overlay, but it will be less suitable for the sculpting process.

The timing for starting the stamping or carving is critical to the success of the project. If the overlay is too wet it will sag or stick to the stamping or sculpting tools, and if it is too dry it will be difficult to work with.

A good gauge of the time to begin is when you can make a clean imprint with your finger without lifting it. This will give you an idea of the strength and flexibility of the overlay and when it is ready to be carved.

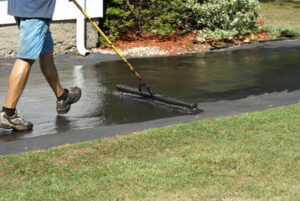
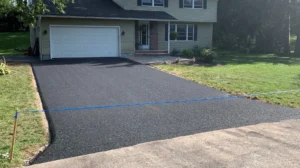
Concrete is a utilitarian construction material, used for sidewalks, driveways and other flatwork. But decorative concrete, which is applied to existing concrete structures, has become a growing business for contractors who specialize in transforming concrete into art. The technique involves a wide range of materials and systems that can be added either during the pouring process or after the concrete is cured, including acid staining, stamped overlays, polished concrete, carved concrete and stone-like overlays.

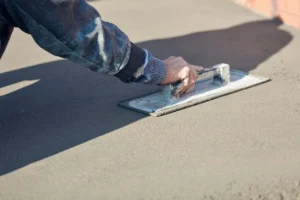
To make a good carved concrete surface, the installer must prepare the concrete well. He must ensure the mix design is appropriate for the intended use and that the concrete has a high enough slump to allow for proper carving. He must also place the forms properly, smooth and finish the concrete correctly. And he must be able to work quickly to avoid random show-through or weak pockets in the concrete.

Carving a concrete sidewalk can be a long, labor-intensive project. To do the job right, you need to line up a couple of reliable helpers and pick a day with a clear sky. If you’re ordering concrete from a ready-mix truck, be sure to choose one that will arrive early in the day. A wet, rainy pour will slow the process considerably.

If you’re pouring a large piece, such as a staircase, consider pouring it separately from the rest of the concrete. That way you can pour a stronger, more durable concrete that is specially formulated for steps. Adding a strengthening agent to the step concrete will also make it easier to chisel and carve.

Ness says there are several concrete mixes designed for vertical carved concrete. Those products usually have longer setting times and better carving qualities than standard commercial concrete, and are formulated with textural elements from sandstone to decayed wood in mind.

Joshua Russell, owner of specializes in concrete sculpting and water features, but he has also done projects that include carved concrete steps. He believes that the current market for these kinds of specialized concrete projects is largely commercial, but that the residential market could be coming into play in the near future as people become more interested in alternative materials like poured concrete.

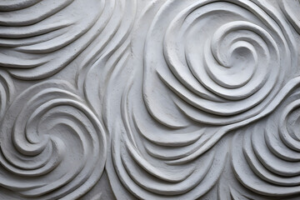
Concrete can be sculpted in a variety of ways, from modeling to direct carving and casting. Direct carving leaves the cylinder, slab or block face of the material visible, an ordered sequence of contained forms and planes which give unity to the sculpture. Modeling is a different process, in which the sculpture is built up from a base of more permanent and rigid materials, such as clay, plaster, wax, concrete or synthetic resins.

Carving into the surface of a concrete sculpture can be done while it is still soft, using a variety of hand tools. When the concrete dries, it can also be carved using power tools. Some sculptors prefer to use both methods in turn, depending on the needs of a particular piece of work.

A newer technique, called wet carving, involves sculpting a soft mixture of sand and concrete by hand. It is poured into forms to make a planter or small sculpture, which must be carved before the concrete sets too hard. The advantage of wet carving is that it can be made with a minimum of equipment and doesn’t produce any dust.

Decorative concrete mixes are designed and manufactured to hold their shape when carved, and stick to walls or other surfaces without moving, sluffing, sliding, drooping or running. They often contain fine grades of sand, polymers and reinforced fibers, and offer long-setting times to allow the sculptor to work on the concrete for extended periods.

Russell, who has worked on a number of large-scale sculptural projects, including his own, describes his preferred method as the “overlay method.” Overlay concrete is applied to the surface and then textured to simulate a range of textures from sandstone to decayed wood. The resulting stone-like finish has the appearance of hand-laid stones but requires less labor and expense, eliminates the need for additional bracing and can be installed on walls over existing drywall or concrete.

Ness and Russell both say that a new generation of sculptors has helped fuel the rise of carved concrete, particularly vertical work. They attribute this to the availability of a wide range of specialized mixes designed for the vertical market that can be easily carved, and which have a high strength-to-weight ratio.

Why Driveway Sealing Is Important

Having a beautiful driveway adds to the curb appeal of your home. But maintaining that pristine appearance requires more than just regular cleaning. You need to make sure it is adequately sealed.

Driveway Sealing

Concrete sealer fills in concrete pores, protecting it from moisture that can damage it over time. It also helps prevent potholes from forming. Visit https://www.rochesternysealcoating.com to learn more.

A clean, pristine driveway adds curb appeal and value to a home. Unfortunately, many homeowners neglect to keep up with the maintenance that their asphalt or concrete driveway requires. Regular sealing is a crucial step in maintaining that pristine look. However, it is not a project that should be taken on as a DIY endeavor. Instead, hiring a professional can ensure that the job is done properly and your driveway is protected from the elements for years to come.

Before the sealant is applied, the driveway should be swept thoroughly and power-washed. This will remove any dirt, debris or moss that may have settled on the surface and prevent the sealant from bonding well. The edges of the driveway should be trimmed and any weeds pulled. This is important because weeds can grow through the sealant and ruin the finished appearance of your driveway.

Once the driveway is cleaned, it is important to allow it to dry completely before starting on the application process. The sealant should be mixed per the manufacturer’s instructions. Different sealants have different formulations and some are designed for newer or well-maintained driveways while others are designed for older, less-maintained pavement. It is also a good idea to purchase one container more of sealant than you think you will need, so that you have plenty of extra in case you need to touch up any areas.

During the sealant application process, it is a good idea to work from the middle of the driveway and move outward. This will help you avoid running out of sealant near the edge of your driveway and will create a smooth, even coat that will last longer. It is also a good idea to follow the manufacturer’s directions regarding how much sealant to apply.

If your driveway has any cracks, it is a good idea to use a crack sealer prior to applying the sealant. This will help fill in any small cracks and help your driveway look its best when you are done. A quality sealant should last about three to five years, depending on how much you use it.

Applying the Sealer

During the application of a sealer, driveways are protected from damage by a protective barrier. A sealcoat, made of heated asphalt bitumen or latex, is poured over the surface of the concrete or blacktop to create a layer that prevents water from penetrating the driveway and causing damage. The resulting smooth surface is similar to a fresh coat of paint or a spa day for your driveway, renewing and revitalizing its appearance.

It is recommended to use a professional to apply the sealer, as the job requires a high-powered pump and extensive experience. While it may be possible for a homeowner to do the job themselves, there is a significant risk of applying too little or too much sealant, which can result in the failure of the project.

Prior to beginning the process, it’s important to carefully read the label and manufacturer recommendations for determining how much sealant will be needed to cover your driveway. It’s also helpful to measure the size of your driveway to get a better understanding of how much material will be required. Once the amount of sealer has been determined, the preparation of the surface can begin. It’s best to start at one end of the driveway and work your way across, so that you have an even coating.

To prepare the surface for sealer, sweep away leaves, acorns and other debris from the surface. If there are weeds growing, pull them or use a degreaser to remove them from the driveway before sealing. For oil or gas stains, scrub the spots with a stiff-bristled brush and specialized cleaner to make sure that they’re completely removed and will not reappear after the sealant has been applied.

Once you’re ready to apply the sealant, begin in one corner of your driveway and pour a ribbon of material across the width of your driveway. Work quickly to ensure that the area is coated evenly. Using the brush side of the applicator or a floor squeegee, push and pull the asphalt to distribute the material evenly. Continue this process until the entire surface of your driveway is covered, then let it dry according to the manufacturer’s instructions.

Drying Time

It’s important to allow the sealant to fully dry before driving or parking on it. This allows it to cure properly and create a protective barrier that blocks out UV rays, moisture and other substances that can damage asphalt or concrete over time. The exact amount of time it takes for the sealant to fully cure varies depending on the type of product used, the weather conditions and other factors.

It can take anywhere from 24 to 48 hours for a driveway to be able to support the weight of cars and other vehicles after it’s been sealed. If you do try to test the sealant by driving on it early, the full weight of the car can cause the surface to deteriorate or bubble, and your driveway will not last as long as it should.

To reduce drying times, it’s important to choose a quality product that will work well in your climate and the condition of your driveway. Some sealants are thicker and slower to dry, while others are thinner and quicker-drying. When selecting a product, look at the manufacturer’s specifications and reviews to find one that works best for your needs.

When applying the sealant, it’s important to follow all of the manufacturer’s instructions. You can use a rubber squeegee or broom to spread the sealant, but it’s best to use a wide paintbrush for detailed areas that require more attention. It’s also a good idea to mask off areas you don’t want to coat with plastic sheeting or drop cloths, just like you would when painting.

After you’ve applied the first coat of sealant, wait eight hours for it to dry completely before proceeding with another application if necessary. You may need to apply two or more coats for your driveway to achieve the desired appearance and protection. For the best results, it’s important to apply sealant when temperatures are above 50 degrees Fahrenheit.

To reduce your chances of running out of sealant before you’re finished, consider purchasing a few more containers than you estimate you need. This way, you can save a container for touch-ups and have enough on hand to ensure that your driveway looks beautiful when it’s finished.

Safety

A driveway that is properly sealed will protect it from water damage, UV rays and the oxidation of the asphalt. This will also help to keep it looking nice and can even add to the resale value of your home. Replacing a driveway is expensive, so it is important to keep up with the maintenance.

In addition to the obvious benefits of a clean appearance, sealing your driveway will help prevent oil, gas and other vehicle fluids from seeping into and damaging the asphalt. It will also help to prevent dirt, ice and other debris from getting into and scratching the surface.

A good rule of thumb is to have your driveway seal coated every three years, but this varies depending on the location and weather conditions. If you notice that your asphalt is starting to look faded, this is a sign that it is time for a new coat of sealant. The appearance of fine cracks is another good indicator that it is time to re-seal your driveway.

The first thing that you will need to do is clear your driveway of any debris, including leaves and grass clippings. You will also need to wash away any stains or spots on the asphalt surface. Make sure to turn off any sprinklers a day before the sealcoating process starts, as they will need to be turned off until after the sealant has dried.

It is important to wear rubber gloves and a mask when working with the sealant, as it can be very harmful if it comes into contact with your skin or if you breathe in its strong odor. It is also important to only work on your driveway when the weather is warm and sunny. If it is too cold or wet, the sealant will not set up correctly and may eventually fail.

One common mistake that homeowners often make is to recoat their driveway too frequently. While resealing can help to prolong the life of an asphalt driveway, it is not effective when the original material has deteriorated to the point where large cracks are prevalent.

Factors That Affect the Durability and Longevity of Asphalt Paving

Asphalt is a versatile material used for various purposes, including roads, driveways, and parking lots. Its durability and longevity depend on temperature fluctuations and traffic volume.

A good paving contractor like Paving Companies Summerville SC will follow proper drainage protocols to ensure that water drains away from the surface. Look for smooth transitions between the pavement and other surfaces or curbs. This will improve weight transfer and indicate a polished job.

Cost is always important when choosing a paving material for your home or business. Asphalt paving is less expensive than concrete and can be installed much faster. It also requires less maintenance than other paving materials. The price of asphalt varies by location and square footage and may be more expensive for projects in difficult-to-reach areas. Additionally, there are a variety of other factors that can impact the cost of a paving job.

Before laying down asphalt, a contractor should do some basic prep work. This includes grading and compacting the sub-base layer. This should help prevent water from sitting on the finished paving surface. The contractor should also use a proof roller to detect soft areas that may not be strong enough for load bearing. The contractor should then replace these areas with stronger aggregate materials.

Asphalt is more affordable than other paving materials, including brick and stone pavers. It is also more weather-resistant and less likely to develop potholes than concrete, making it an excellent choice for cold climates. In addition, asphalt can be colored to create a more unique look. It is also more environmentally friendly than concrete, as it melts ice quicker and can be used for road surfaces that need to be porous to allow water to pass through them.

Another advantage of asphalt is its constructability. This means it is easier to lay and compact than other pavement materials, speeding up construction and reducing labor costs. This feature makes it the preferred paving material for design-build contracting.

While the initial investment in asphalt paving can be high, it is a smart and long-term investment that will save you money in the long run. In addition, it is a recyclable material that can be reused over time, saving energy and cutting down on landfill waste. The asphalt industry has been working hard to find ways to cut the cost of constructing asphalt, including using reclaimed asphalt pavement (RAP), which contains some of the same ingredients as new asphalt but is cheaper.

Asphalt is a durable material that can last for years if properly maintained. However, it will deteriorate over time due to heavy traffic, weather changes, and other factors. This can result in cracking and other problems that affect the durability of the pavement. These issues can be costly and should be addressed immediately to prevent further damage. This can be done through various methods, including repairing cracks and repainting the surface. Depending on the severity of the problem, a complete asphalt replacement may be necessary.

Some factors determine the durability of asphalt paving, including rutting, temperature fatigue, and dynamic modulus. Pavement properties, climatic conditions, mix design, and paving procedures influence these factors. In addition to these factors, it is important to consider the long-term performance of the asphalt mixture to predict its lifetime. This can be done using a series of indoor and full-scale accelerated pavement testing.

One of the most important factors in determining the durability of asphalt paving is the strength of the base. The base must be dense enough to support the asphalt layer and flexible sufficient to avoid wheeled vehicle damage. It should also be porous to allow water to drain from the asphalt.

Another important factor is the ability of the asphalt to withstand repeated impacts. This is especially true for high-speed roadways. For this reason, many asphalt paving projects are designed to provide high durability. This can be achieved by adding special additives to the asphalt mix. These additives can help reduce the rutting of the asphalt and increase its longevity.

Asphalt is a popular choice for tennis and basketball courts because of its smooth surface, which allows for better ball bounce and player movement. It is also used as a surfacing material for outdoor running tracks, playgrounds, and other recreational areas.

While asphalt is a durable material, paving it can be expensive. Several factors can add to the overall cost, including equipment rentals, cleaning, and transportation expenses. Using the right cleaning agents can minimize these costs, but they can still be a significant portion of the total project cost.

Asphalt is a major contributor to atmospheric emissions, global warming, and other environmental problems. However, the emissions generated by asphalt processing can be minimized using various best practices. These include reducing the fuel used in transporting materials, utilizing on-site recycling, limiting idling time for construction equipment, and using alternative fuels. The most important factor in the sustainability of asphalt pavements is controlling hazardous chemicals released into the air as the mix is heated. These chemicals can contaminate water bodies, endanger aquatic life, reduce water quality, and degrade views.

The environmental impact of asphalt paving can be mitigated by incorporating warm mix asphalts and pervious asphalt pavements. These technologies reduce emissions and energy consumption by lowering the temperature of the asphalt mix. Moreover, these methods do not compromise the mechanical properties of asphalt. Research on these types of asphalts has shown that they are comparable in stiffness to hot mixes and have good fatigue resistance, Marshall immersion, rutting, and aging characteristics.

In addition, the use of recycled aggregates in warm mix asphalts helps reduce the need for fresh, virgin material. These products also contain recycled bitumen, which further reduces the impact on the environment. This method is also a great way to increase the lifespan of existing roads without wasting valuable resources.

Proper stormwater management is another key factor in minimizing the environmental impact of asphalt paving. This can be achieved by implementing drainage solutions, such as bioswales and retention ponds. In addition, it is important to avoid paving over sensitive areas, such as wetlands. These areas are essential habitats for many species and should be protected.

In addition, minimizing the number of road crossings during the paving process is a good idea. This will reduce the amount of traffic congestion and air pollution. It will also reduce the need for repaving, saving money and energy. Additionally, a thorough site inspection before paving can help identify any potential drainage and soil stability issues. These problems can cause costly delays and increase the project’s overall cost.

When working with asphalt, taking proper precautions to prevent injuries is important. It’s best to wear protective clothing, such as long pants and a T-shirt, and eye protection. Wear a face shield or safety glasses covering your whole face for maximum safety. Respiratory protection is also critical, especially in confined spaces. The best option is a respirator that’s been properly fitted and tested for your job.

Workers should be aware of any overhead obstructions, such as electrical wires, when paving. In addition, they should be mindful of underground utilities. The location of any utility lines should be marked with appropriate markings. Workers should also be careful when getting on and off equipment. They should be sure to use handholds/footholds that are solid and stable. Lastly, it’s essential that they read the Material Safety Data Sheet (MSDS) for the product they’re working with and follow any PPE instructions.

The mixing and testing processes used in asphalt paving can create hazardous fumes. These fumes contain many chemicals that are known carcinogens and can lead to lung problems. Exposure to these fumes can cause various symptoms, including headache, fatigue, skin rash, cough, and irritation of the eyes, nose, and throat.

During the mixing process, additives may be introduced to improve the durability of the asphalt mixture. Some of these additives are chemical compounds that increase the flexibility and durability of the asphalt. Samples are taken throughout the mixing process to ensure the mix meets specifications and quality standards. Special paving machines or trucks transport The asphalt to the construction site.

Asphalt is heated at high temperatures during mixing to achieve the desired properties. This process releases several hazardous substances, including benzo-a pyrene and polycyclic aromatic hydrocarbons, which can cause respiratory illnesses and cancer.

NIOSH research shows that engineering controls for large paving pavers can significantly reduce worker exposure to hot asphalt fumes. However, it’s not feasible to retrofit existing paving machinery with these technologies. As a result, NIOSH is encouraging paver manufacturers to develop generic kits for reducing worker exposures without creating tripping hazards from ductwork or placing undue burdens on the paver’s hydraulic or electrical systems.

The Benefits of Concrete Leveling

Concrete Leveling Cincinnati slabs that are uneven or have cracks can be unsightly, but they’re also a safety hazard for pedestrians and drivers. Rather than replacing the entire slab, concrete leveling is a quicker and less disruptive repair option.

The process involves drilling holes into the sunken concrete and pumping a polyurethane foam mixture or mud into the voids to lift it back to its original position. This is known as mudjacking or slabjacking.

Concrete leveling, or mudjacking, is an effective repair method that can save property owners time and money. It is a non-invasive solution that doesn’t require demolition or heavy machinery and can be completed in less than half the time of pouring a new slab. This means that you can return to using your concrete surface almost immediately after the repair, and it won’t cause any disruptions to your yard. Moreover, mudjacking is less costly than concrete replacement because it addresses the root of the problem instead of simply replacing it.

Concrete sinking is often caused by soil erosion underneath a slab. As the soil erodes, it creates voids that can lift the concrete. Concrete leveling fills these voids and lifts the concrete back to its original position, eliminating any sinking that has occurred over time. It is much more affordable than concrete replacement, saving homeowners on demolition, labor, and material costs.

Concrete leveling costs depend on various factors, including project type and location. For example, the price of a concrete leveling job will vary depending on whether the slab in question is located in a difficult-to-reach area or requires extra aesthetic considerations. The type of concrete in question will also impact the final price. For example, a garage floor or foundation is typically more expensive to raise than a patio or driveway.

When looking for a concrete leveling company, consider choosing one that uses polylevel instead of mud. This alternative approach is more eco-friendly and cost-effective than standard mudjacking, which uses a mixture of cement, water, and clay. In addition, the poly level is more resistant to hydration than classic mud jacking, making it an even better choice for your home’s concrete surfaces.

Uneven concrete can lead to dangerous trip and fall accidents, so it’s important to have your concrete leveled as soon as possible. In addition to improving safety, it can help maintain your home’s value and prevent future damage. Call a local concrete leveling service for a free quote if you notice signs of uneven concrete, such as hairline cracks in your floors or sunken sidewalks.

Aside from the fact that uneven concrete is unsightly, it can also pose a safety risk for people who walk on or drive over it. Correcting the issue as quickly and cost-effectively as possible is essential. Fortunately, today’s modern concrete leveling technology allows you to repair sunken or uneven concrete slabs without replacing them entirely.

Concrete leveling is a process that involves drilling small holes into the sunken concrete and injecting a specialized compound to lift and stabilize it. It is less disruptive than concrete replacement and can usually be completed within hours. It is also less expensive than pouring new concrete, making it a great option for residential and commercial properties.

The injected compound used in concrete leveling is made from polyurethane foam. When pumped through the holes in the concrete, it expands and fills any voids in the soil beneath the sinking slab. This process lifts the concrete back to its original position, restoring the surface and eliminating any safety hazards. The holes are then filled and sealed, leaving you with a solid and sturdy slab.

Unlike other concrete leveling methods, such as mudjacking, polyurethane foam concrete leveling addresses the root cause of the problem. Mudjacking only lifts the concrete but does nothing to strengthen or improve the soil underneath. In contrast, the polyurethane foam injected into your concrete stabilizes the soil and improves drainage. It can even help to reduce the amount of water that collects around your home or business, reducing the chance of foundation damage and flooding.

While other concrete leveling techniques erode over time, polyurethane foam lasts a lifetime. It is also weather-resistant, making it a great choice for all environments. Concrete leveling is a reliable solution for fixing an uneven concrete slab. Still, it should be considered on a case-by-case basis and weighed against the alternative of concrete replacement.

Replacing an entire slab of concrete is costly, disruptive, and time-consuming. Concrete leveling is a much more affordable and convenient solution for fixing an uneven concrete slab.

Uneven concrete slabs can be unsightly and pose safety hazards for people walking on them. Leveling sunken or settled concrete can be done quickly and cost-effectively than tearing up and replacing it, making this a good option for homeowners looking to improve the look of their property while addressing a potential safety issue.

Uneven concrete surfaces are a common problem from soil erosion or other environmental factors. They can cause trips and falls and can interfere with the proper functioning of structures like driveways and walkways. Concrete leveling involves injecting a material beneath the surface to lift it back into its original position. This can be a cost-effective alternative to replacement, especially if the damaged concrete is not structurally compromised.

There are a few different methods of concrete leveling, each with advantages and disadvantages. Mudjacking is a traditional method that combines cement, water, and soil to “jack” up the concrete. This can be more costly than other options and may require core drilling to create holes in the concrete for injection.

On the other hand, polyurethane foam leveling uses a lightweight and highly durable material injected under the concrete to fill any voids and raise it back into its original position. This is much faster and less disruptive than mudjacking and can be completed in just a few hours.

Another benefit of polyurethane concrete leveling is that it can also be used to repair areas with cracks in the concrete. This can be a more cost-effective solution than using rebar to reinforce the area, and it can provide an attractive finish to the concrete.

Concrete leveling can be an affordable and effective option if you have a hollow or uneven concrete slab that needs to be repaired. Contact a professional concrete leveling company to discuss your alternatives and to get a quote. A reputable concrete leveling company will use high-quality materials and cutting-edge equipment to ensure a long-lasting and durable result. They will also be able to answer any questions about the process.

Concrete leveling is an effective and efficient way to fix sunken or uneven concrete. In addition to being unattractive, rough concrete can create dangerous trip and fall hazards for pedestrians and vehicles. This is why finding a professional concrete leveler you can trust is important. Taking the time to ask the right questions during your estimate, researching companies, and reading reviews will help you feel confident in your decision.

One of the most common ways to lift concrete is through mudjacking. This process involves drilling small holes into the sunken concrete and pumping a heavy cement slurry underneath the slab. The slurry fills any voids that have formed beneath the concrete, and this pressure is enough to raise it.

Mudjacking is a relatively inexpensive concrete leveling method, but it has drawbacks. Because the slurry is so heavy, it could sink the lifted concrete back down over time. This can be a problem because it will require another costly repair. In contrast, concrete lifting foam is lightweight and won’t cause the lifted slab to sink again.

Another downside of mudjacking is that it could be more environmentally friendly. Because the slurry contains so much heavy dirt, it can pollute nearby water sources. This is especially problematic because it can contaminate groundwater, which affects local ecosystems. Concrete leveling, on the other hand, is an environmentally friendly option because it uses existing concrete to raise it instead of digging up and replacing it.

Whether you have an uneven driveway, walkway, or patio, hiring a professional concrete leveler who can repair it effectively is critical. This will save you money in the long run and protect your property from structural damage. Plus, it can help prevent dangerous trips and fall accidents that can lead to serious injuries. And, if you’re planning to sell your home, level concrete can als

Facts About Residential Concrete Driveways

Concrete Contractors Colorado Springs add value to homes and are highly durable. However, they can require substantial investment, so homeowners should carefully consider their options.

For example, homeowners should consult with a concrete contractor to determine the best thickness for their driveway. Thickness is a major factor in a concrete driveway’s structural capacity.

residential concrete driveway

The cost of a concrete driveway can vary depending on the size, thickness, and finish you choose. A thicker slab is usually more expensive than a thinner one, but it will last longer and be stronger. A standard residential concrete driveway should be at least 4 inches thick. A commercial or industrial concrete driveway may be up to 6 inches wide. The thickness is determined by how much weight the driveway will need to support, such as a vehicle or trailer.

Poured concrete is the most popular option for a residential driveway, typically costing between $3 and $5 per square foot. This includes the price of the concrete itself, delivery fees, and installation costs. Labor costs account for the rest of the total, as workers set up and break down the forms, prepare the site, install rebar and other add-ons, lay the concrete, smooth it out, cure it, and remove the forms.

Before the concrete is poured, a sub-base must be laid down. This consists of gravel and sand, and it can increase the overall project cost by a few dollars per square foot. A typical concrete contractor will charge between $6 and $12 per hour for on-site work.

Concrete can be colored before it is poured to create different textures and looks. A basic color stain is inexpensive, but more intricate patterns and multiple colors will cost more. Most contractors will also add a broom finish to the concrete, which helps improve traction and can be very attractive.

A textured finish typically costs between $8 and $12 per square foot. The broom finish is not as smooth as a standard paved surface and can provide good traction, even in wet conditions. Some contractors will use a salt finish, which is textured with rock salt before the concrete is poured and gives the surface an uneven texture.

Many homeowners also choose to add an apron connecting the driveway to the road. This can add $3 to $10 per square foot to the project cost and the cost of building a drainage system or stormwater drains if necessary.

Concrete is a highly durable material that can withstand heavy traffic and weather conditions for up to 50 years. It can also withstand heavier loads than asphalt, making it an ideal choice for driveways accommodating trucks and RVs. However, the longevity of a concrete driveway depends on its thickness, construction method, and maintenance.

In general, a concrete driveway should be at least 4 inches thick. This is essential for providing sufficient strength and durability. Concrete poured too thin will not be strong enough to withstand the weight of heavy vehicles and may crack or crumble easily. To increase the durability of your residential concrete driveway, have your contractor mix in some rebar, an iron mesh that strengthens the structure.

The best residential contractors use ready-mix concrete, which is more cost-effective than mixing and pouring the concrete from scratch. This type of concrete is made with aggregates such as gravel, stone, and sand, which make up about 75% of the finished product. It’s also important to choose a concrete driveway contractor that uses quality cement, as this will impact the strength and longevity of your driveway.

A professional concrete contractor will consider many factors when constructing a concrete driveway, including the function and layout of your property. They will carefully examine the existing terrain, including the subgrade, and select a concrete mix to provide the desired strength and durability for your driveway. They will also ensure that the concrete is placed in the correct location and slope, which is crucial for drainage.

Residential concrete contractors can also offer various customization options to enhance the look and feel of your driveway. For example, your concrete driveway can be stained to look like natural stone, brick, or slate. You can even have it etched to display your family crest or a message. These customization options can add visual appeal to your home and complement various landscaping styles and color schemes. However, these upgrades are typically more expensive than standard concrete.

Concrete driveways offer a variety of styling options. They can be stained, dyed, or stamped with a pattern to create a unique look for your home. They are also available in a wide range of colors. Concrete driveways poured and colored simultaneously can be textured to mimic baked brick or natural stone. This gives your home an exotic, old-world style without the hassle of laying individual stones and ensuring they fit properly.

Modern concrete driveways often feature a simple color palette, with white or gray tones that complement the surrounding landscape and house. The contemporary aesthetic also emphasizes texture and pattern. Some homeowners choose a broom finish, while others use a swirled finish or seamless texture skins to add interest and contrast to the plain concrete surface.

Aggregate-stamped concrete is another popular option for residential concrete driveways. This type of concrete uses regular concrete mixed with aggregate, which can be colored or natural-looking gravel. The concrete slabs are then stamped with a pattern to imitate the look of stone or pavers. Aggregate-stamped concrete offers a textured, nuanced look that is not as smooth as polished concrete.

Consider a broom finish if you want to keep your driveway as simple as possible. This type of finish uses a brush to create a more subtle texture than swirled or swirled-and-smooth-finish concrete. It is a good choice for homes with a minimalist design aesthetic and can be easily combined with a gravel or grass driveway.

A textured concrete surface can be stamped or troweled by hand to create a specific texture. This can be done using wood floats for coarse textures; aluminum floats for medium textures, or steel trowels for a smooth finish. Adding a textured finish to your concrete driveway can make it more visually appealing and improve its durability.

A poured-in-place concrete driveway is more durable than an asphalt one because it has a thicker base that prevents cracking. However, concrete can still crack due to freezing and thawing cycles. For this reason, a poured-in-place concrete driveway should be reinforced to help prevent cracking.

Concrete is an extremely versatile material that can be used for various projects, including residential driveways. Its strength and durability make it an excellent choice for a driveway, which must be able to support the weight of vehicles. The process of installing a concrete driveway requires careful planning and preparation. Professional concrete contractors can help you determine the right size and shape for your driveway and ensure it is poured correctly. They can also advise on maintaining your concrete driveway and keeping it looking new.

The first step is to prepare the site for pouring the concrete. This involves clearing the area and removing any debris or vegetation that could interfere with the final surface. The ground must be level and compacted to ensure a strong base for the concrete. The soil should have a 1-2% slope away from structures and buildings to ensure proper drainage. The contractor can use a vibratory plate compactor or tamper to achieve this.

Once the ground is ready, the forms are set up to hold the concrete. The form boards must be straight and sturdy so they do not fall apart during the pouring process. Once the form is in place, the concrete is poured and smoothed. It is important to check the concrete frequently to ensure it is evenly spread and consistent. Removing any soft spots from the concrete as soon as they appear is also crucial.

After the concrete is poured, it must be allowed to set slightly before finishing. This can take 1-2 hours, depending on weather conditions and the concrete mix used. Then, the contractor can use a magnesium hand float to create a smooth finish and float out bull float lines.

A concrete driveway is a great way to enhance the look of your home and increase its value. It is easy to clean and maintain and lasts for years. It is also a good investment, which will help you recover the initial cost when selling your house.